You will find below all the information you need to organise your trip by yourself, make the most of it and feel like you’ve lived the adventure to it’s fullest.
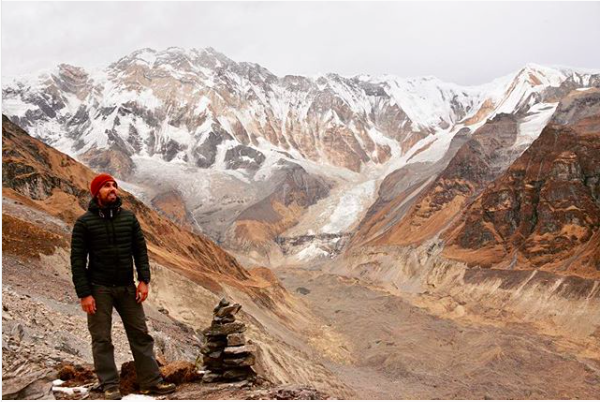
Season: We went early December and it is supposed to be the best time of the year to get to Everest Base Camp, slightly late for Annapurna but we had an amazing weather and experienced the first incursion of winter over 4,000m. A few snow flakes and strong winds reminded us that we were in high altitude – the rest of the time was absolutely beautiful with sun and mild temperatures during the day.
Check the weather before your trek:
https://www.mountain-forecast.com/peaks/Annapurna-Sanctuary/forecasts/4130
Transportation: Fly to Kathmandu – then you have two options to join Pokhara, the main base for ABC trek:
- Tourist Bus count a full day- start at Kanti Path near Thamel – no need to pre-book – just go at 6:30 – roughly 800 rupees (divide by 100 to get USD cost)
- Fly from KTM to Pokhara – only 45 min but highly dependent on weather (I took the bus to be on the safe side timewise)
The actual trek: Guide or not? The ABC trail is really easy to follow and very well indicated so you don’t need a guide if you are confident enough that you will plan it accordingly to your fitness level, Mountain experience (hiking or trail running as it is not alpinism at all). A map available in Pokhara is very handy to plan your trek and follow your progression. Porter or not? The beauty of this trek is the abundance of villages with very clean and cheap lodges to drink a tea, refill water, eat lunch and dinner and spend the night. You will cross one every 2 or 3 hours maximum. It reduces a lot the gear required to do the trek to basically clothes, sleeping bag, water bottles, snacks and camera. See equipment section below
Accommodation and food: There are lodges managed by Nepalis all along the trek. They usually cost 100 to 200 rupees per person per night (2 dollars) as long as you have dinner at the same place. They don’t make much money on accommodation but live out of the food. Food in lodges is surprisingly good for the remoteness of certain parts of the trek. Made of locally cultivated veggies, it becomes slightly more expensive as you go up ~1.5 times more and still very affordable. Do not bargain, it is a set price by the government and would be badly viewed. We haven’t been sick at all from the food. We recommend to stop and have a hot meal for lunch on the way and encourage you to buy as little packaged food as possible to reduce waste. E.g. buy oranges and bananas grown locally and sold by people along the way rather than snickers bars… Water: I used a bladder in my backpack to hydrate constantly along the trek. I recommend to carry 1.5 litres at all times and refill when stopping for lunch. It reduces significantly the weight required. Water costs from 50 to 150 rupees per liter either filtered or boiled. If you want to make it cheaper use a portable filtration system or tablets. A thermos can be good to refill with tea in the morning if you have space. Probably no more than 1/2 a liter. It is not really cold up there depending on the season of course and you will drink more water than tea. (A cup of lemon tea in a lodge cost 50 to 90 rupees)
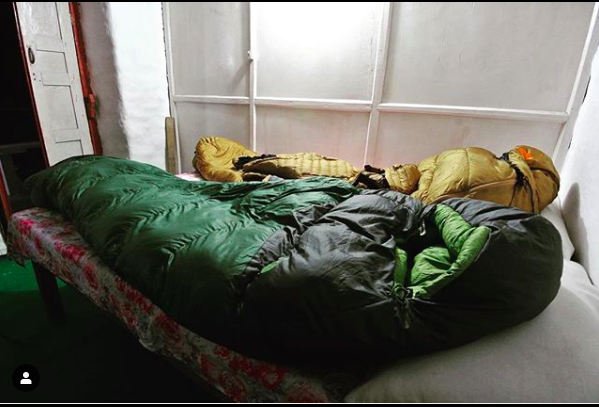
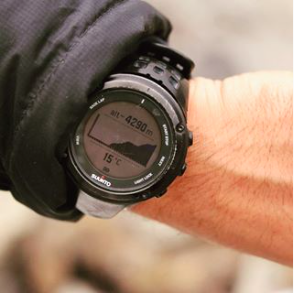
Equipment: Highly weather dependent, I recommend to carry clothes to cover for summer days with 20+ C all the way down to -10 snowy days in altitude. Adapt quantities to the duration of your trek and how many days you are comfortable with wearing the same clothes. Base layer: Fast drying is the key so avoid cotton. If you don’t like synthetic and have the budget, my Icebreaker in Merino was by far the best. 1 short sleeves t-shirt, 2 Long sleeves t-shirts (1 light and 1 warm, usually wearing the light during the day and warm in the evenings) 1 long legs underpants for the highest section of the trek above 3000 meters if it gets cold. Mid layer: I used only one long sleeves, zipped warm mid-layer. My advice is to remove it as soon as you warm up to avoid excessive transpiration and wetting your base layers. When stopping I used to remove the base and only wear the mid layer while the rest was drying. Wind and rain protection – Weather changes very quickly up there and I recommend to pack a pair of water proof pants and jackets as shells under which you may adjust the quantity of base and mid layers. Gloves and head protection – thin gloves are a must for colder days while proper snowgloves may not be used at all – however if it gets really cold and windy, you may need them – a good beanie is a must. Down jacket – evenings and mornings can be cold so it is a must – you can simply wear your clean dry evening base layer under it and feel comfy. Otherwise the usual shorts and pants will be perfect for most days (I had one of each) Shoes and socks: I’m a trail runner and didn’t wear boots for years. Depending on your preferences, waterproof trail running shoes will do however their sole is usually softer than boots and you may feel more the rocky ground while carrying 15 to 20 extra kilos than you normally do when running and for much longer. A well maintained ankle is a plus too when tired to avoid rolling it. After October when snow is likely to fall above 3000 meters, I recommend boots or gaiters on your trail runners. Good socks are the key and must keep your feet dry! Change at lunch time if you can, once dry you can use them again but it will reduce the risk of chaffing and blisters. Again good smart wool socks or similar work a treat. I carried a pair of compression socks for the flight and bus trips as well as for recovery during evenings and I wore them on the way down when hitting 3000m D- in a day to reduce the impact on my calves. Otherwise they are to thin for good hiking as they don’t absorb excess perspiration. Backpack – We carried all our gear ourselves and felt pretty happy with it. A good 50 to 70 liters backpack is enough, the bigger the more unuseful things you will carry. Of course make sure it is fitted with belts and rain cover. An elastic to quickly store your mid or top layer is great to avoid opening the bag every time. I used two internal compartments to pack my clothes and organize the bag, making it easy to load and offload. Sleeping bag – Lodges provide blankets but they may not be sufficient to keep you warm and not as clean as your habits. A warm -10°C sleeping bag will be perfect along with a liner to sleep comfortably. I’d advise to at least buy your own liner if you plan to rent a sleeping bag Others: A light towel for showers, classic toiletry (soap, toothbrush…) Sun protection – high index sunscreen for skin Lips protector for the day and hydrating stick for the evening Sunglasses Sunhat – it can be really hot during the day up to 3000 meters Enough toilet paper for the duration of the trek (you can also buy it on the way) – I used the water when available to wash first and only dry with paper again as you want to maintain a high level of hygiene to eliminate risks of irritations. A Simple headlamp for the camp or if you start early mornings and if you overshoot your estimated arrival time after sunset. A USB charger – there is electricity in most lodges for ~100 rupees Poles – I didn’t use mines so it’s really depending on your preference A good mountain watch is not mandatory but really nice to have to check your altitude, distance…especially if you do it at fast pace and need to manage your progression. A camera of course or at least your phone to take photos A swimsuit if you feel like going to the hot springs in Jinhu
Trek planning: Two main factors will define how long you should plan: 1 – fitness level to endure distance and elevation 2 – acclimatization to altitude Depending on where you start distance and elevation to reach Chomrong where there is only one way forward, will change. Phedi is the closest start from Pokhara (1/2 hour taxi from Pokhara ~1100 to 1400 rupees, bus is cheaper but doesn’t pick/drop you at lakeside in Pokhara where most tourists stay). It has also the most elevation and distance as you are crossing a couple of valleys. It’s the one we did . Start in Nayapul is further away from Pokhara but in the right valley however first kms are on a dirt road with quite a lot of dust depending on traffic from other travelers stories. Time to reach Chomrong will vary. From phedi, two days is the most realistic with an overnight stop in Landruk. It is a good way to start acclimatizing with most sections around 2000m elevation. From Chomrong to ABC there are multiple locations to stop. We did it in two days with a stop at Himalaya but paid it with headaches for gaining too much elevation on the last day going from 2700 m up to ABC at 4130m. While distance and elevation are the main obstacle up to 3000meters, altitude and lack of oxygen will be the limit above 3000m. Staying at MBC at 3700m and doing the 2 hours walk to ABC before sunrise is a good option if you don’t have much time to acclimatize. On the way down, your fitness is the only real limit. We walked all the way back to Chomrong from ABC in a day and then to Phedi the next day, which is a lot. I would recommend to break it in at least 3 days or finish a bit earlier and catch a Jeep or bus as described below. From Chomrong you have again multiple options to extend the trip to Poon Hill for example or Mardi Himalaya via Pothana or shorten the trip taking either a Jeep back to Pokhara in Landruk or a bus in Siuwe. In that case you may get back to Pokhara in 2 days only.
Permits and TIMS: You can get your permit and TIMS from the ACAP office in Pokhara usually open 9AM to 5PM for 2000 rupees each document. Make sure to bring 4 ID photos and your passport with the valid visa. You will need to present either / or at various check points on the trek. If you don’t have photos, you can find agencies doing them for 500 rupees for 4 photos.
